![]()
Carbon Fiber Hood
Project
(last update 04/10/07)
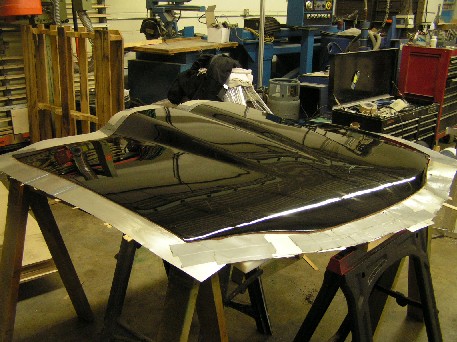
This is the hood with run off added. The run off allows us to extend the mold beyond the edge of the hood. We used 6" aluminum flashing that we bought from a local hardware. Then attached it to the bottom of the hood with screws and double sided tape. Next we super glued paint sticks about every 6” around the perimeter of the hood to stiffen the thin aluminum. You could use other materials for the run off but make sure the resins won’t stick to it. We also covered the joints with duct tape.

This is the edge of the hood;
the brown material is a non hardening clay. The clay is added to keep
the fiberglass and resin from running between the hood and the run off.
If that was to happen it may be impossible to pull the hood from the
mold. We press the clap around the entire edge of the hood and used a
razor blade to remove the excess clay. **IMPORTANT** the top part of
the razor blade must be kept at a slight angle towards the center of
the hood. This (----\ ), not this (----/).

We
applied four coats of Johnson’s paste wax to the hood. Each coat was
applied very sparingly and allowed to dry five minutes them buffed to a
high gloss. We also applied a coat of wax to the run off but without
polishing it. A heavy coat of mold release was applied to everything.
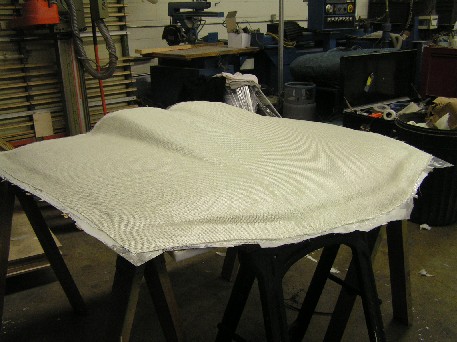
Shown above is the first of two coats of Epoxy surface coat.
Well I forgot to take a couple of
pictures but I’ll explain where we are at.
After the surface coat was allowed to tack up we applied a layer of 4oz veil cloth and wet it out with epoxy resin. Next we added two separate layers of 10oz cloth wetting out each layer. Show above is a layer of 50oz cloth that we lightly tapped into the previous wet coated layer. This was our stopping point so we could enjoy the Easter weekend. We should be able to finish the mold on Monday.
Well here it is! I know, I missed a couple of pictures but it wasn't my fault. When we got to BVM the hood was sitting outside and the mold was done. Steve came in on Saturday and finished it and didnt bother to call us. These guys are just that great and I'm very happy to call them friends! To finish the mold Steve added three more layers of 10oz cloth and one more layer of 50oz, wetting out each layer. He then used 1/2" plywood to create the box shaped mold support and used pieces of cloth and resin to attached it to the back of the mold..

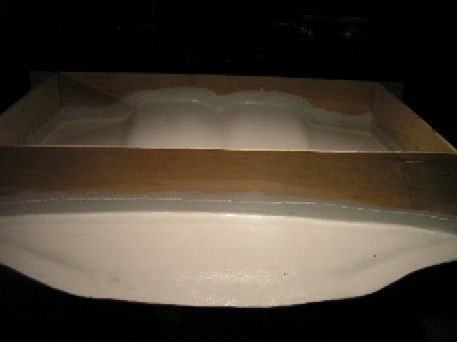
Here is what the cavity of the mold looks like. Jesse is using a scribe to mark a line 2" from the inside edge completely around the mold. Next he will use that line as a guide to trim the excess material away.

Jesse is using a air saw to trim away all the excess material.**IMPORTANT** When cutting or sanding you should always wear a mask and eye protection. Just so you know I had Jesse stage this shot but we both wore the protective gear while working.

Here is a good view of the trimming and you can get an idea of how thick the mold actually is. Jesse trimmed just outside the scribed line and we will clean the edge with a grinder and sanding disc.
![]()
Jerry and Nita's
home page / Family Matters
/ Ferret Antics
/ Our
Critters
Gone Hunting
/ Home Theater
/ Talon Project
![]()
![]()
You can reach us at: ferretantics@earthlink.net
![]()
This page was created and maintained by
Jerry
at
Sensible Design Solutions